You can find Part 1 here. If you missed it, go back and read it first!
Uploading citations into MetaReviewer
The difficult parts of managing citations – we think – are the steps you have to take before opening and entering MetaReviewer. So if you’ve made it this far, this is the home stretch!
Adding citations from the Citation Template File can be accomplished in one step. Navigate to the “Add Citations” button on the right-side pane of the Project management page; once there, click on “Import citations.” A pop-up will appear that asks you to upload the file. If the upload is successful, you will see a screen that tells you how many citations MetaReviewer uploaded. Double check that number matches the number you expected.
Although we maintain it’s simple to upload citations to MetaReviewer, it’s not a foolproof process and issues can arise. In the MetaReviewer User Guide, we mentioned several reasons why an upload from the Citation Template File could falter, all of which are worth repeating here:
- Multiple commas within a cell
- Hard/carriage returns within a cell
- Misalignment between cell content and column format
- Special characters (e.g., corrupted foreign language characters)
- Not using the correct file format (.xlsx instead of .csv)
Our suggested solutions are pretty straightforward and can be boiled down to: Know Your Data (KYD). In this case, your data are your citations. We know they can look downright spooky—all those missing cells, long strings of text, and oddly formatted author lists. As we suggested in the User Guide, one great solution is to upload your file to CVS Lint, which will “check whether it contains the columns and types of values that it should.” Sometimes a few minutes of data observation can save hours of headaches.
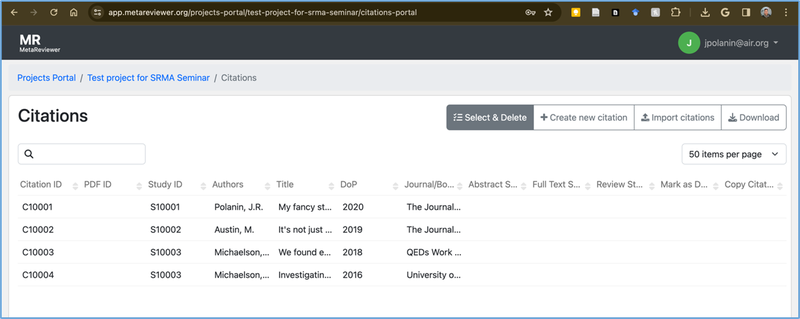
Speaking of KYD, once you’ve successfully uploaded the citations into MetaReviewer, double check they look correct in the Citations Portal. We built this interface to mimic how it feels to interact with data in Excel, so the data should be easy to quickly observe.
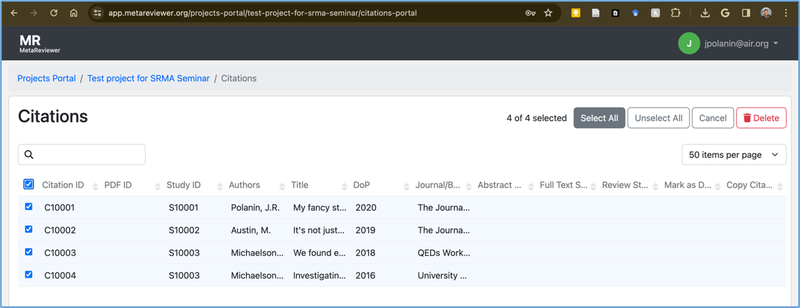
If for some reason the Citations are incorrect, incomplete, or just need some refinement, the best and easiest solution is to remove all of them simultaneously. Doing so will allow you to make the needed modifications within Excel and re-upload the Citation Template File.
To do so, first click on “Select & Delete” in the toolbar at the top of the Citation Portal.
Then select all the citations listed in your project by clicking on “Select All.” Then press the – super scary, red – Delete button.
If deleting and trying again is not an option, for instance if you’ve already started the project, you can instead modify a single citation or add more citations without deleting everything you already have. We provided those steps and much more information on citation management in the MetaReviewer User Guide – check it out!
Managing citations in MetaReviewer
Let’s turn to the business of managing existing citations within MetaReviewer, starting with the Individual Citation Page. If you’ve been following the Learn Blog or used MetaReviewer in the past, you know that this page mirrors the Individual Study Page. We wanted the two pages to look and feel similar, but with specific actions that reflect each page’s purpose. Users will find all the information uploaded from the Citation Template File within this page.
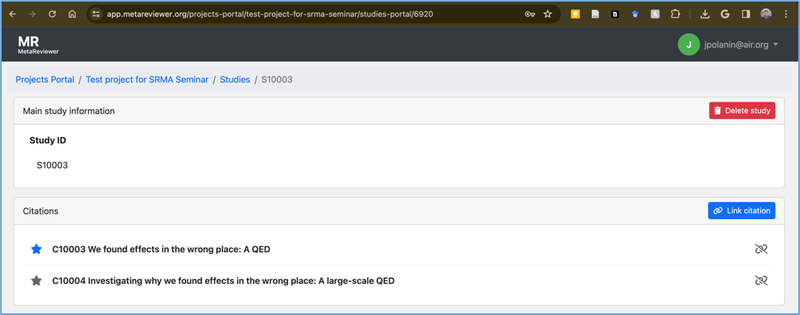
In Part 1 of this series, we discussed how multiple citations can be linked to a single study. To view the linked citations to a single study, visit the appropriate Individual Study Page as seen in the picture below.
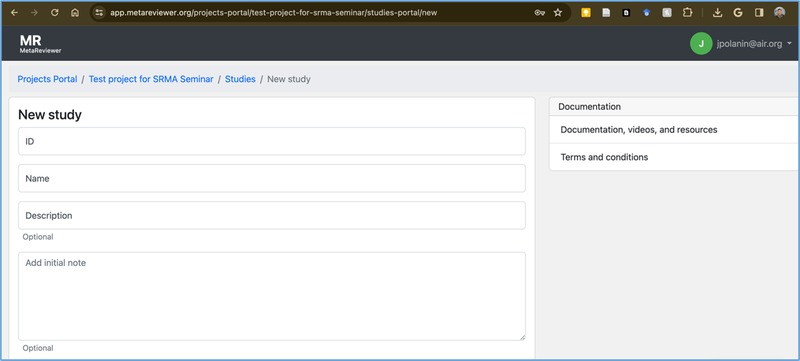
For Part 2, we turn to the issue of a single citation linked to multiple studies. This scenario occurs when, for example, a single group of authors report the results from multiple independent studies within one journal article. The most straightforward solution is to create an additional Study ID that represents the second (or additional) study(ies). Navigate to the Studies portal, click the “Create new study” button in the top right hand corner, then create a new study using the interface below.
Once completed, navigate back to the Citations portal and to the Individual Citation Page that needs to be linked to multiple studies. Click on the “Link study” button and start typing the Study ID. The bar should auto populate with IDs (or study titles) that match what you’ve entered. Click on the appropriate Study ID and you’re done!
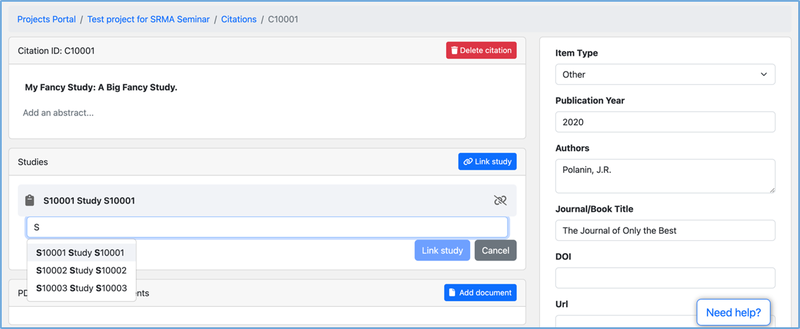
Navigate back to the Citation portal to view your handiwork. We now see that Citation ID C10001 is linked to two Study IDs: S10001, S10002. (It’s difficult to see both in the column but you should be able to see at least the “, S1…”.)
Looking (a ways) ahead
We think MetaReviewer provides simple, effective functions for basic citation management. We know there are additional functionalities that can further support more advanced citation wrangling, and we will be working to add those functionalities for future versions of MetaReviewer. In the meantime, MetaReviewer will be ready to handle your citation needs once you’ve done a little bit of upfront work, and we think it’s worth it.