Here at MetaReviewer, we’re all about poppin’ tags. Study tags, that is.
What are study tags?
Study tags are fully customizable fields that can be added to appear alongside the default assignment and status fields on the studies portal. Tags can be used to sort studies just like any other study-level identifier. Quite simply, they give users the power to accommodate their specific metadata needs for each and every MetaReviewer project.
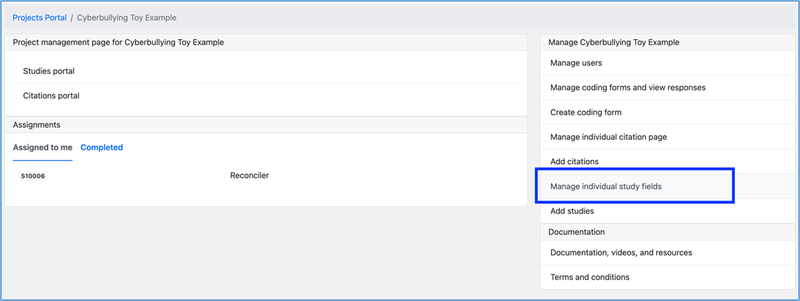
New tags are added from the individual project page. Select the “Manage individual study fields” option from the Management pane on the right.
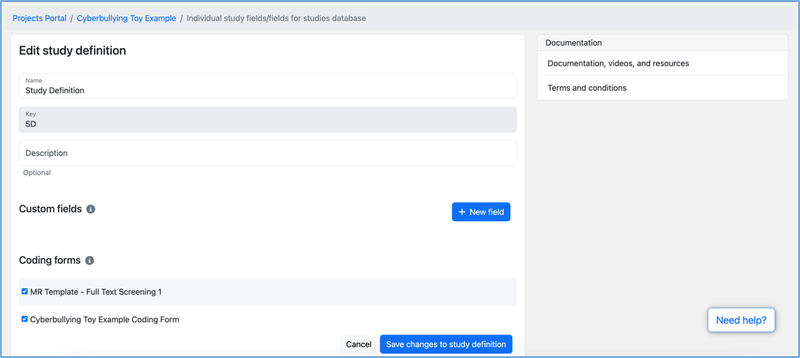
This will take you to the Edit study definition page, where you’ll see an option for Custom fields.
Creating a PDF status tag
One useful application of the study tag is to add a field for PDF Status. As all synthesists know, retrieving articles for full-text screening is an essential part of the process, but many articles are either difficult or impossible to track down. Organizing the full list of studies by those that have been versus still need to be retrieved makes it easy to delegate the retrieval task to specific team members. Additionally, identifying the set of studies that cannot be retrieved is important for subsequent metadata and eligibility reporting.
To create a new PDF Status field, click the blue “+ New field” button on the Edit study definition page. This opens a portal (“Add New Custom Field”) where you can create your study tag. Here, we’re calling our tag “PDF Status.”
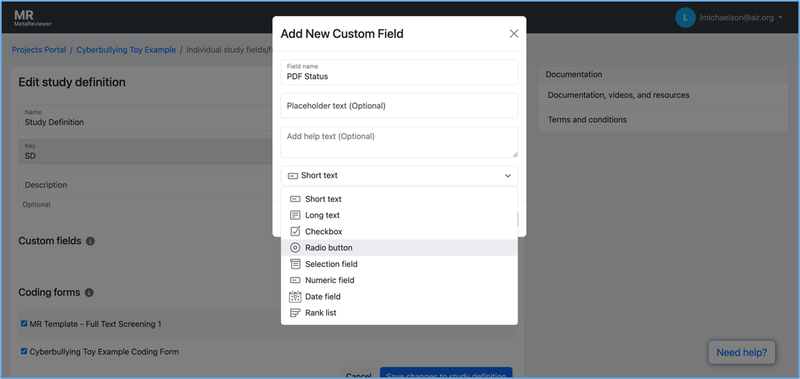
Below the field name, you’ll see optional fields for placeholder and help text. Under those you’ll find a dropdown menu where you can select the question type from multiple options. PDF Status is a tag where users will select one of multiple mutually exclusive statuses, so the “Radio button” type is most appropriate.
Now that we’ve specified that our tag will be a radio button, a new “+ Add Option” button will appear in the portal. Here, we add the possible PDF Statuses. In our experience, the following options cover all the ways in which the PDF Status tag is used for filtering, sorting, and reporting: Found, In Process, Needs Help, and Not Available.
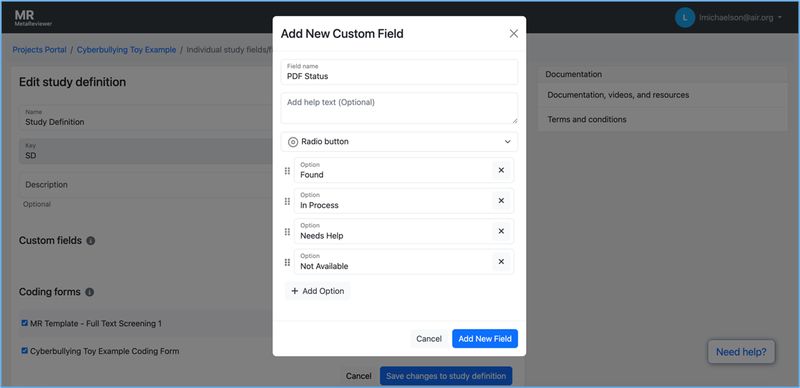
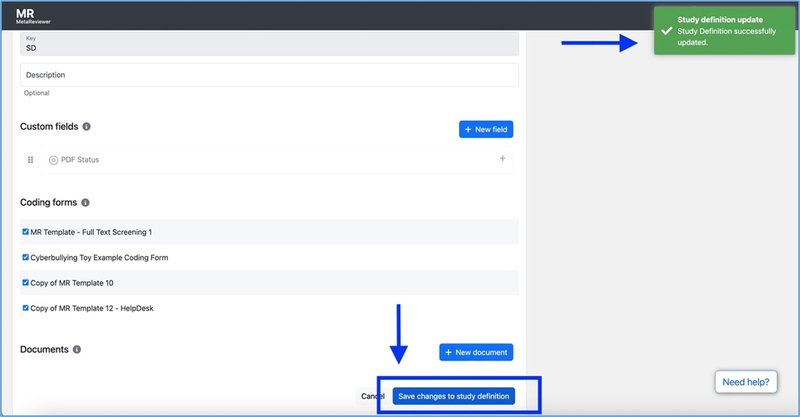
Click the blue Add New Field button to exit the portal, then “Save changes to study definition.” You should see a green checkbox in the top right corner of the screen indicating that your Study Definition has been successfully updated. Make sure you see this save notice before closing the Add New Custom Field window.
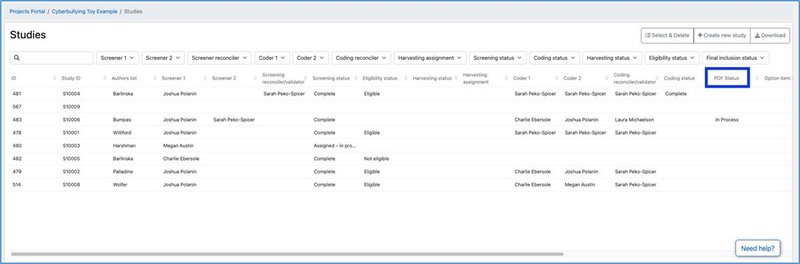
To view your shiny new study tag in action, navigate back to the studies portal for your project. Your tag will appear at the top alongside the default sortable fields. User-generated tags appear towards the end, so you may have to scroll over to the right to see the tag that you added.
Make sure you instruct team members to utilize the study tags you worked so hard to create when they’re screening and coding on the individual study page. Tags appear in a separate pane on the bottom right.

And that’s all there is to it! Other favorite applications of study tags include marking studies to be used for piloting, and identifying studies that require translation. Enjoy your newfound power, cause poppin’ study tags is pretty awesome.