Happy 2026, fellow synthesists! We're kicking off the New Year with some exciting updates in MetaReviewer. First, managing screening and coding is easier than ever thanks to the addition of bulk assignment; project admin can now assign multiple studies to multiple users with a few clicks of a button. Second, we've streamlined and consolidated our coding form templates to ensure you get paired up with the one you need. To learn more about bulk assignments, keep reading! To learn more about our new coding form template options, check out the User Guide.
Bulk assignments
Project teams with many studies to review know the painstaking and time-consuming task of manually assigning screeners and coders to one study at a time. With our new bulk assignment functionality, project admin can now easily assign multiple studies to one or more team members! No matter the assignment configuration you have in mind, you'll follow the same five key steps:
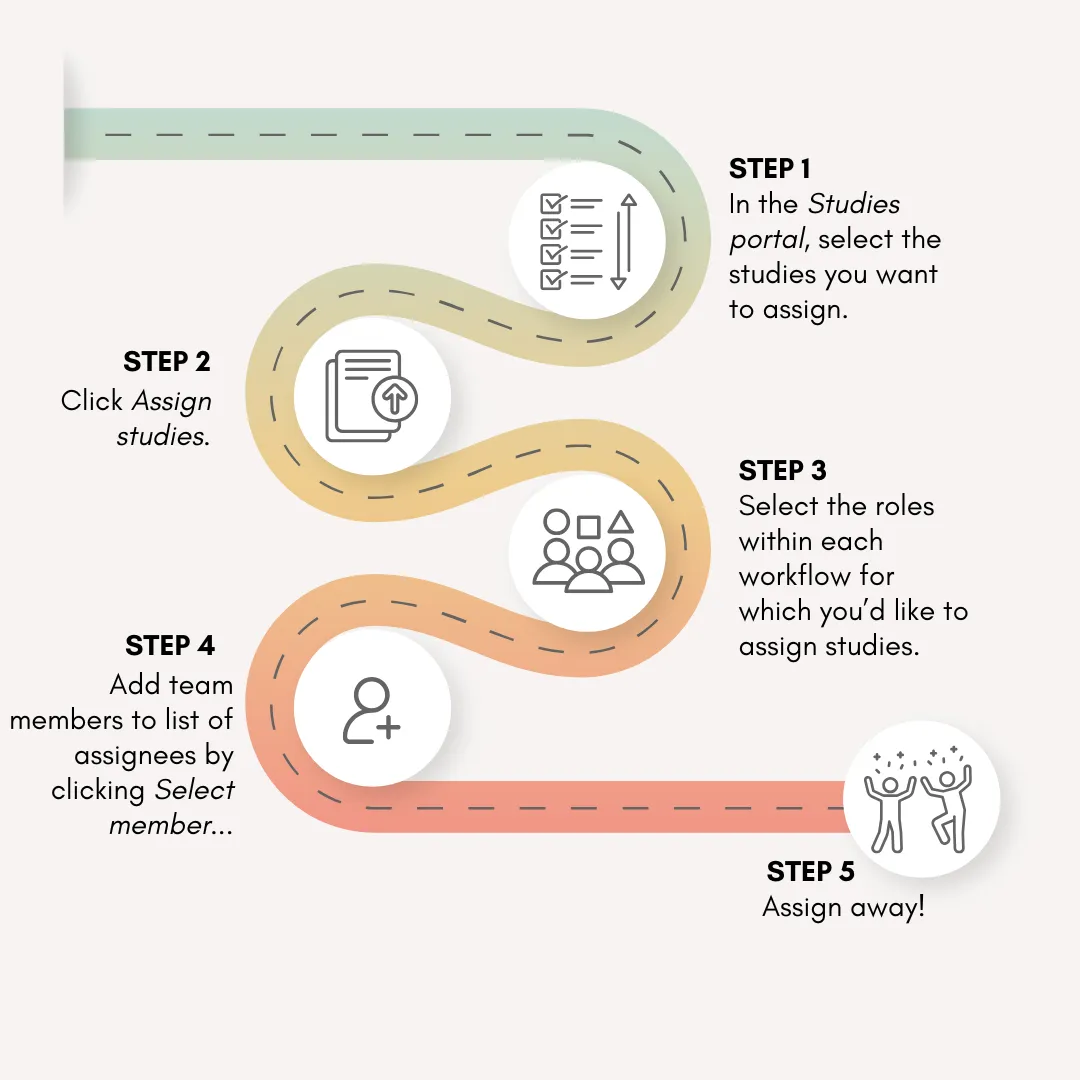
These steps are designed to cover several assignment scenarios that teams use on their projects, a few of which we describe below.
For the admin who wants to do everything, everywhere, all at once
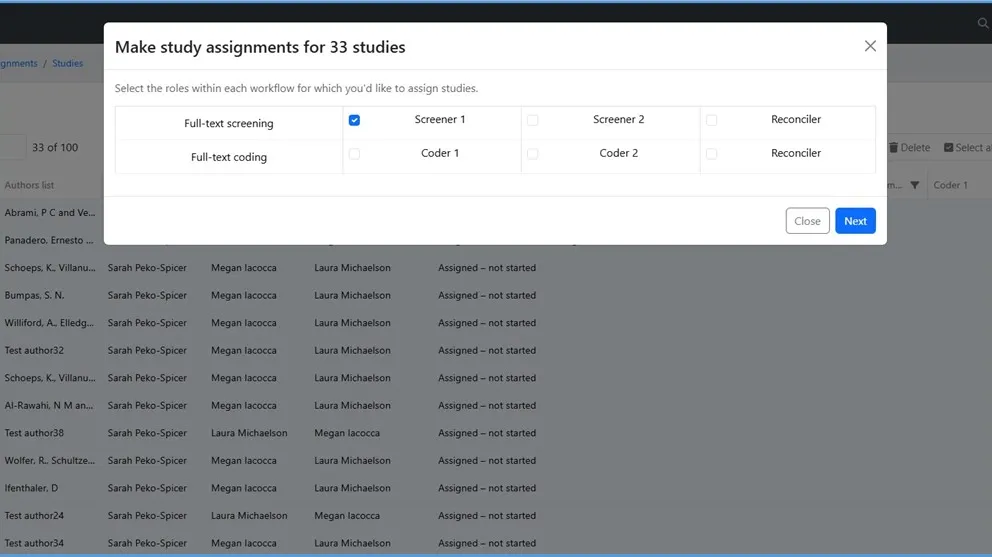
If you're starting with a blank slate and want to make all full-text screening and coding assignments at the same time, simply go to your Studies portal, click the Select button followed by Select all (Step 1), and click Assign studies (Step 2). In the study assignments modal, you will see the number of studies for which you will be making assignments and the workflows in which you will be making assignments. Select the roles (e.g., Screener 1, Screener 2, Reconciler/Validator) in each workflow for which you would like to make assignments (Step 3). In the example below, the project admin plans to double-screen and reconcile during full-text screening and have one coder and validator for full-text coding:

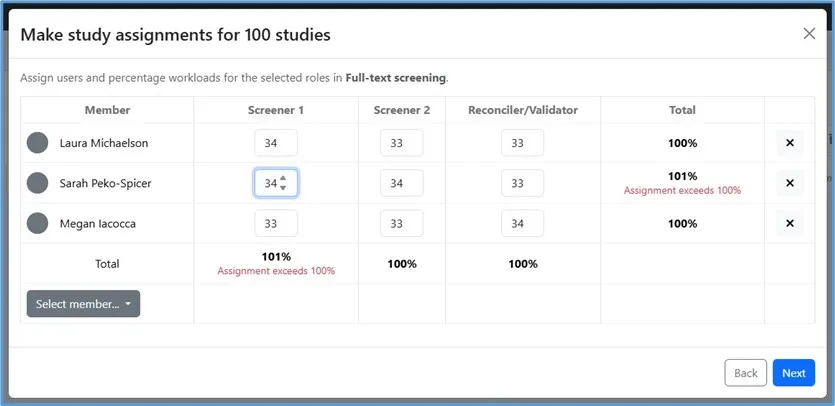
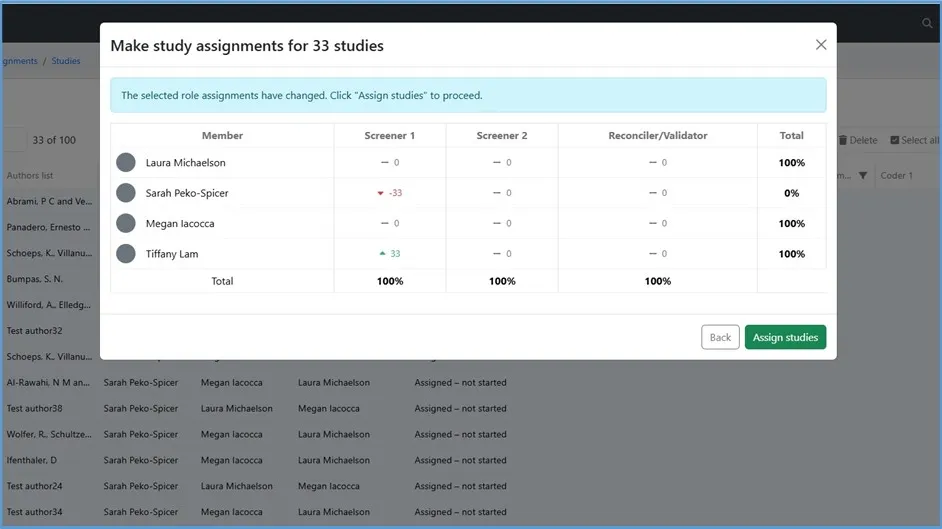
Do you hate doing mental addition? Are you worried about accidentally assigning a team member to conflicting roles (e.g., screener and reconciler on the same study)? Don't worry! Let the percentages be your guide:
- The percentages at the end of each row indicate the proportion of selected studies assigned to that team member, across roles for that workflow
- The percentages at the bottom of each column reflect the distribution of selected studies assigned to each role in the workflow, collapsed across team members
So, all you have to do is make sure that each percentage doesn't exceed 100%! If you do go over, you can use the up/down arrow in number fields in that row or column to adjust assignments until you bring the percentage back down to or below 100%.
Repeat the process for the coding workflow, confirm the assignments, and click Assign studies. Voila! Your team is now ready to hit the ground running.
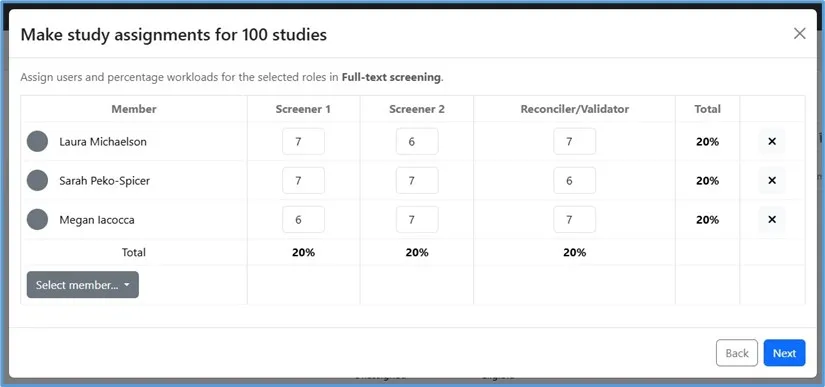
For the admin who works in batches
Just because you have 100 studies doesn't mean you need to make assignments for all of them at the same time! If you want to assign, for example, 20 studies in one batch and save the rest for later, you can do so by either (a) selecting 20 studies from the Studies portal (Step 1) and proceeding with the rest of the process, or (b) selecting all studies (Step 1) and using the number fields in Step 5 to restrict the number of total studies assigned to 20:
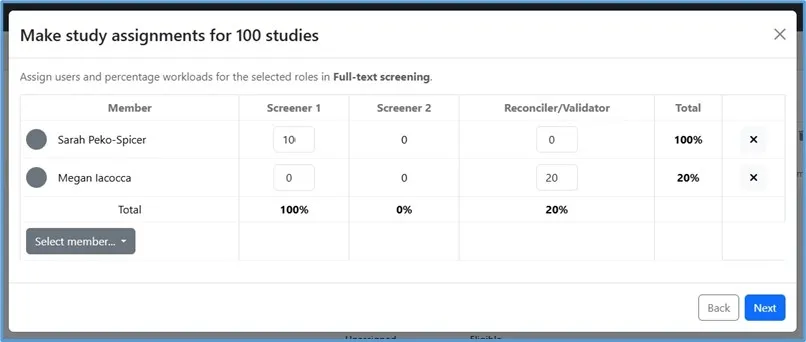
For the admin who just wants a spot check
If you have resource constraints or just a delightfully breezy attitude, you might decide that you want to assign a screener to each study and have a validator spot-check a portion of those studies (e.g., 20%). You can do this by selecting all studies from the Studies portal (Step 1), only selecting Screener 1 and Validator roles for assignments (Step 3), and making assignments in Step 5 such that the Screener 1 column and the Reconciler/Validator column percentages are 100% and 20%, respectively:
For the admin who is unexpectedly down a team member
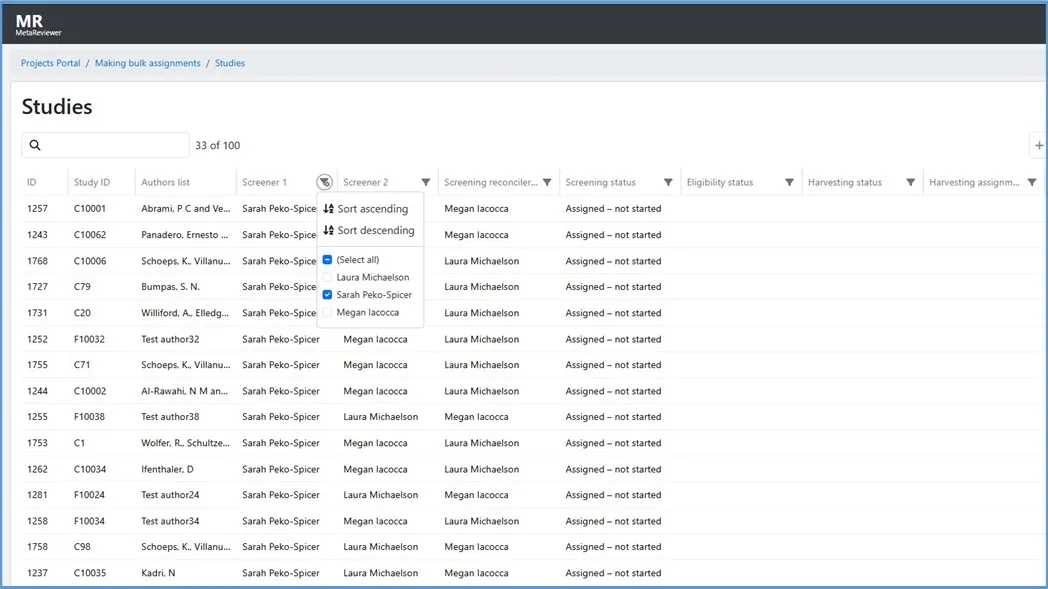
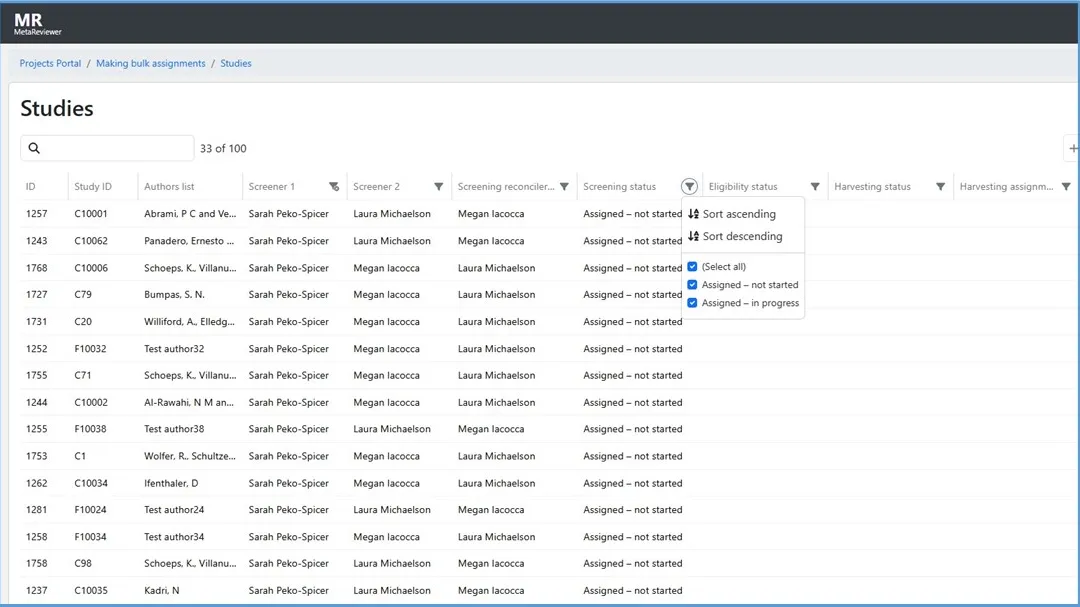
Imagine a Coder 1 team member leaves your project in the middle of coding. You can re-assign their incomplete studies by using Studies portal filters in Step 1 and then proceeding with Steps 2-4 of bulk assignments. That is, go to the Studies portal, filter the Coder 1 column on their name, and filter the Coding status column on "Assigned – Not started" and "Assigned – in progress." Click Select and then select the displayed studies using the checkboxes on the left-hand side of the portal. In the bulk assignments modal, select the Coder 1 role and click Next. From here, you can zero out the team member's Coder 1 assignments and add them to another team member's plate. Don't forget to use the column and row percentages as your guides!

Ready to assign?
The best way to learn a new feature is by experimenting with it yourself. So, head on over to MetaReviewer and get your bulk assignment reps in so you can start 2026 on the right foot! As always, email the Help Desk with any questions you have and check out the User Guide for even more detail about this new feature.